
Problem first: misfit prostheses and lost chair time
Many implant cases fail at the handoff between clinic and lab because positional error accumulates. Implants are precise; small angulation or distance errors make big trouble for the prosthesis. That is why clinics try the Photogrammetry 3D scanner—to capture exact implant locations without extra guesswork. The problem-driven aim here is simple: fix the transfer error before design starts.

How photogrammetry addresses the problem
Photogrammetry records implant orientation using multiple photos of scanbodies. It reads geometry, not just surface texture. That gives a coordinate set for each implant with minimal stitching error. I’ve worked with dental labs for years and seen cases where this single step removes remakes. The method pairs well with standard CAD workflows and keeps the digital chain short.
Step-by-step digital implant workflow
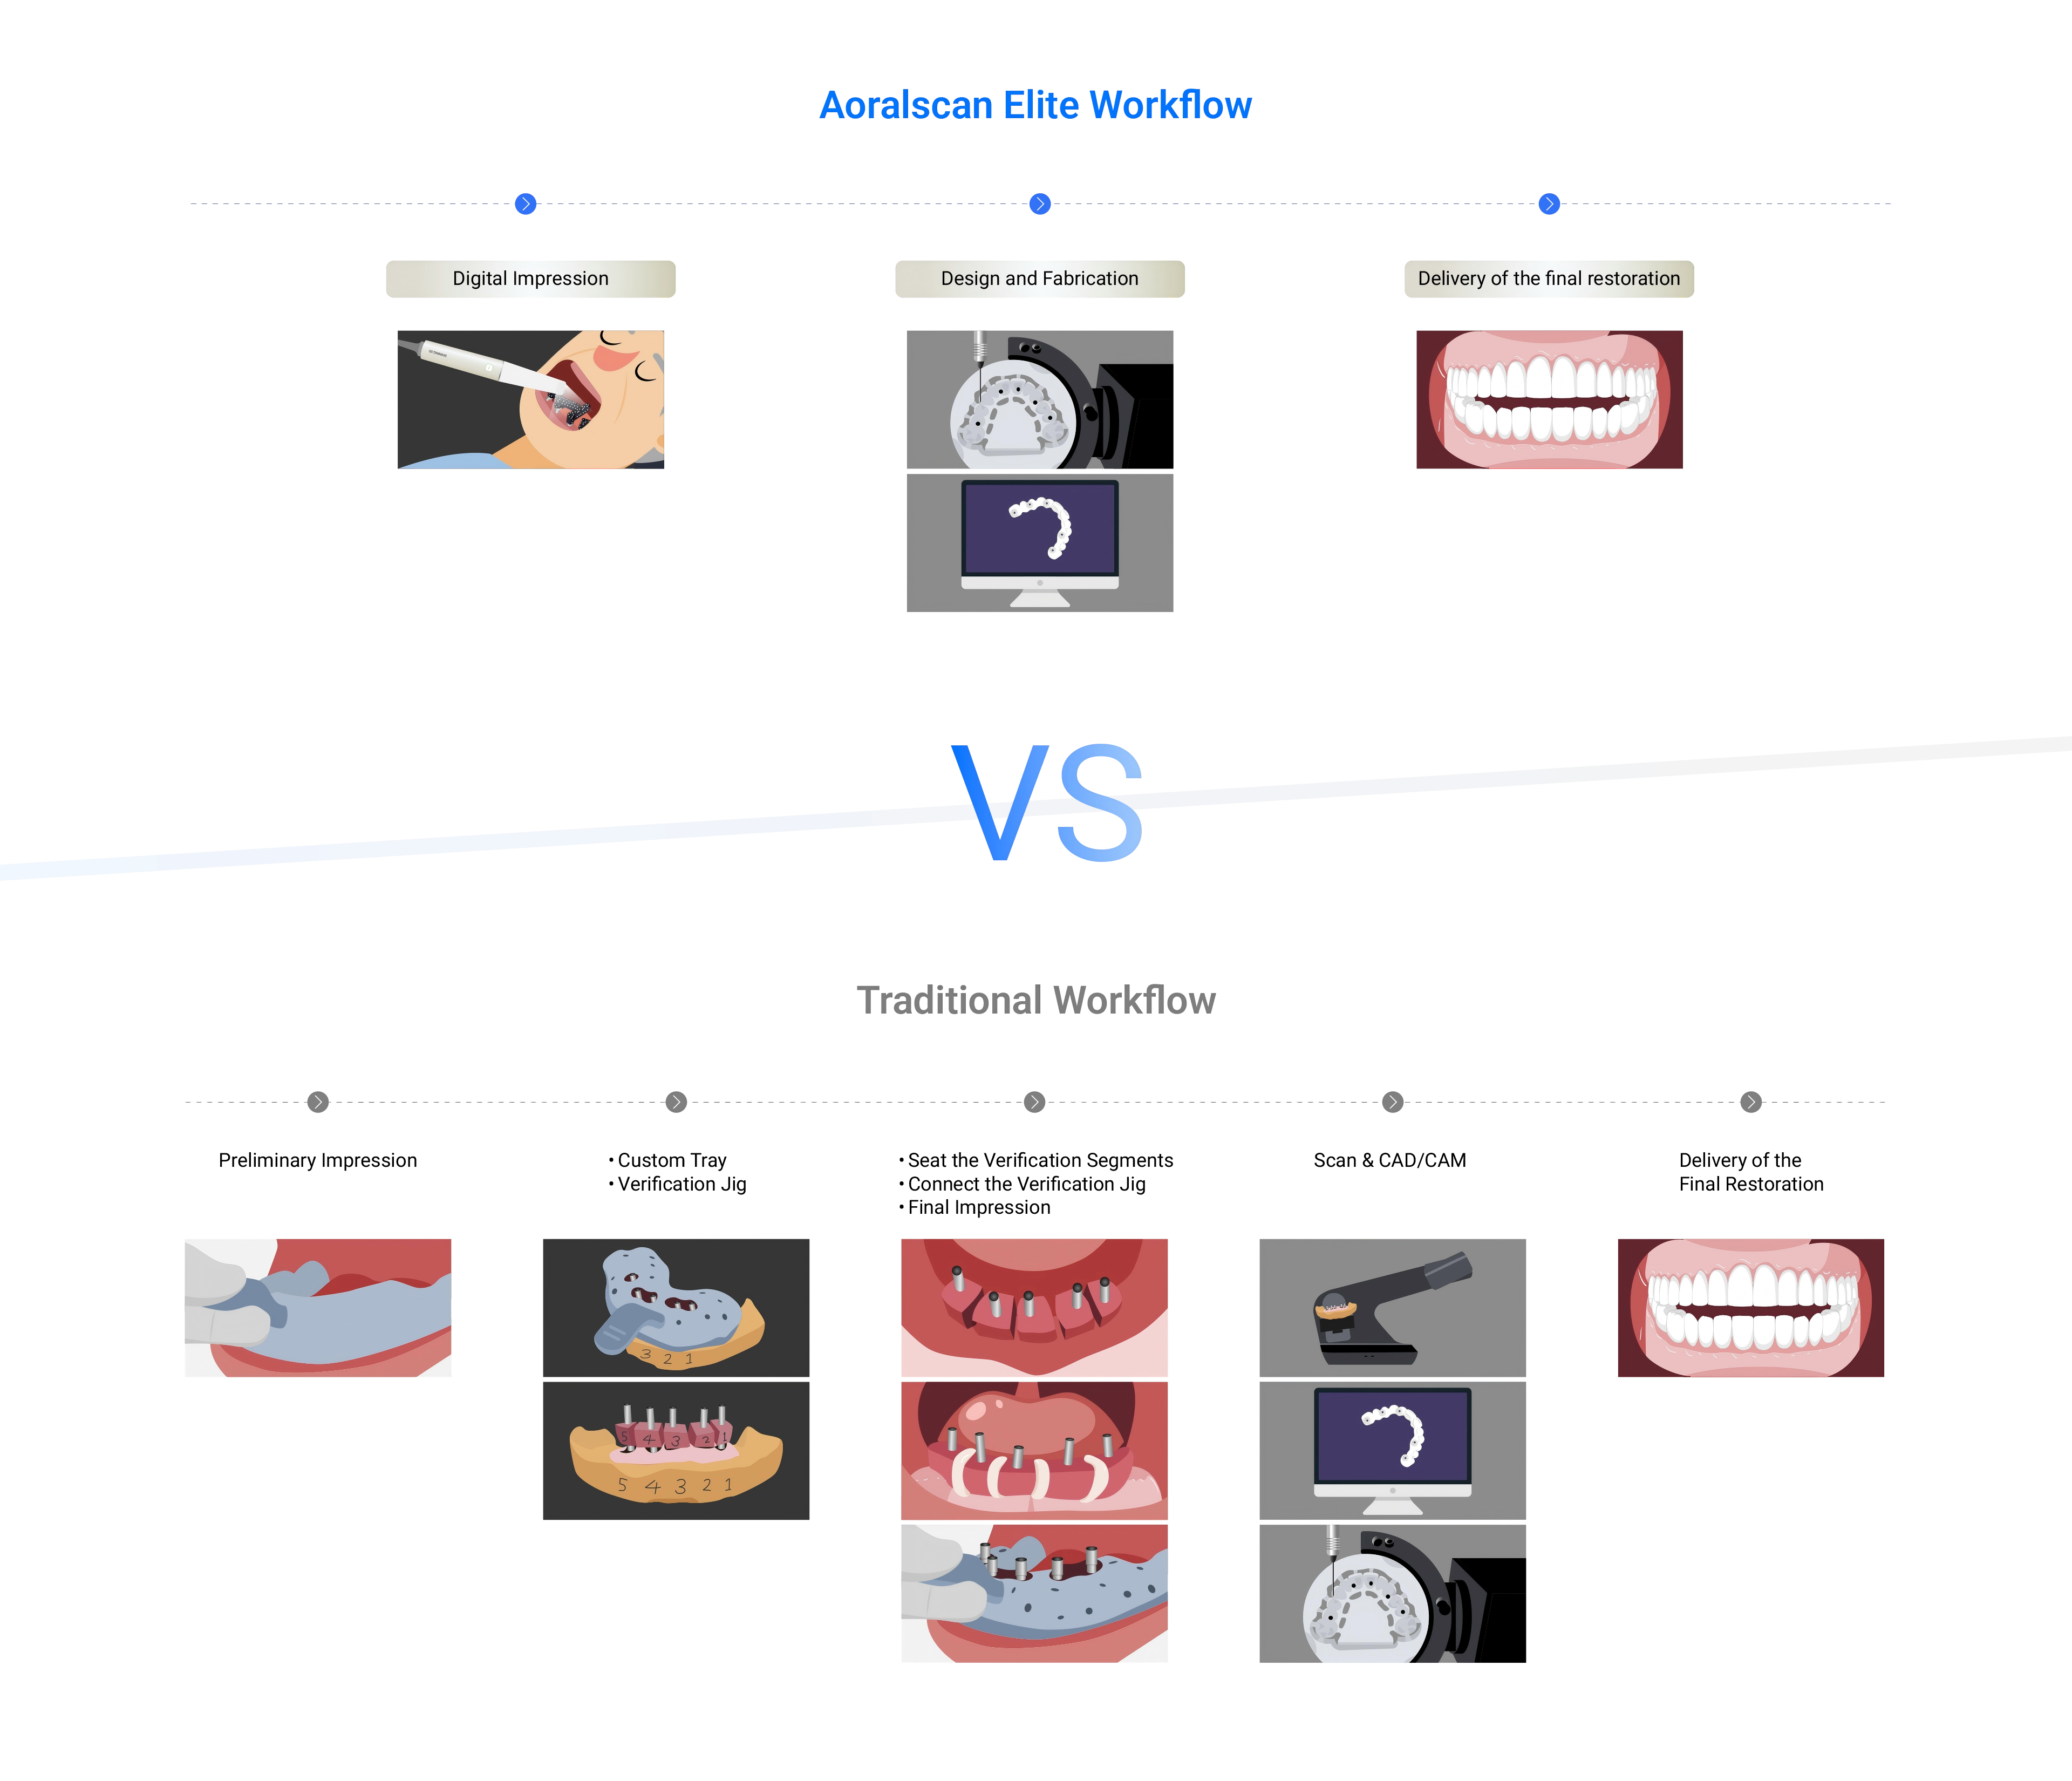
1) Prepare: attach well-fitting scanbodies and ensure isolation. 2) Capture: follow the photo protocol—steady camera, full coverage around each scanbody. 3) Process: software triangulates points and outputs precise implant coordinates. 4) Export: send implant positions (and clinical photos) to the lab in compatible format. 5) Design and manufacture: CAD receives exact implant geometry; design screw channels and crowns accordingly. Each step reduces one common cause of mismatch.
Common mistakes and fixes
Bad lighting or reflective scanbodies produce noisy data—use matte spray or controlled lights. Moving the patient or camera mid-sequence breaks triangulation—steady the camera and use a fixed path. Mixing incompatible scanbodies causes alignment failure—standardize parts between clinic and lab. Always verify coordinate files in your CAD before milling or printing; a quick virtual check prevents chairside corrections.
Alternatives and when to choose them
Intraoral scanners are fast for single-tooth or soft-tissue work but may struggle with multiple, widely spaced implants. CBCT gives bone context but less precise external implant coordinates without a rigid reference. Lab-based CMMs are accurate but add steps and turnaround time. Choose photogrammetry when you need exact implant positions quickly and want to avoid physical impressions for multi-implant prostheses.
Real-world anchor
Working with a Bangkok implant lab, I watched technicians shorten turnaround by routing photogrammetry outputs straight into CAD; that practical shift was enabled by the Photogrammetry dental scanner and clear file interoperability between clinic and lab.
Final synthesis
Problem-driven logic shows the point: stop errors at capture. Use precise photos, good protocol, and the right exchange format so the design phase has true implant geometry. When the clinic and lab share reliable implant coordinates, the prosthesis fits first time. That consistent result is exactly what SHINING 3D DENTAL technologies aim to make routine—practical, verifiable, and integrated into everyday implant workflow.